


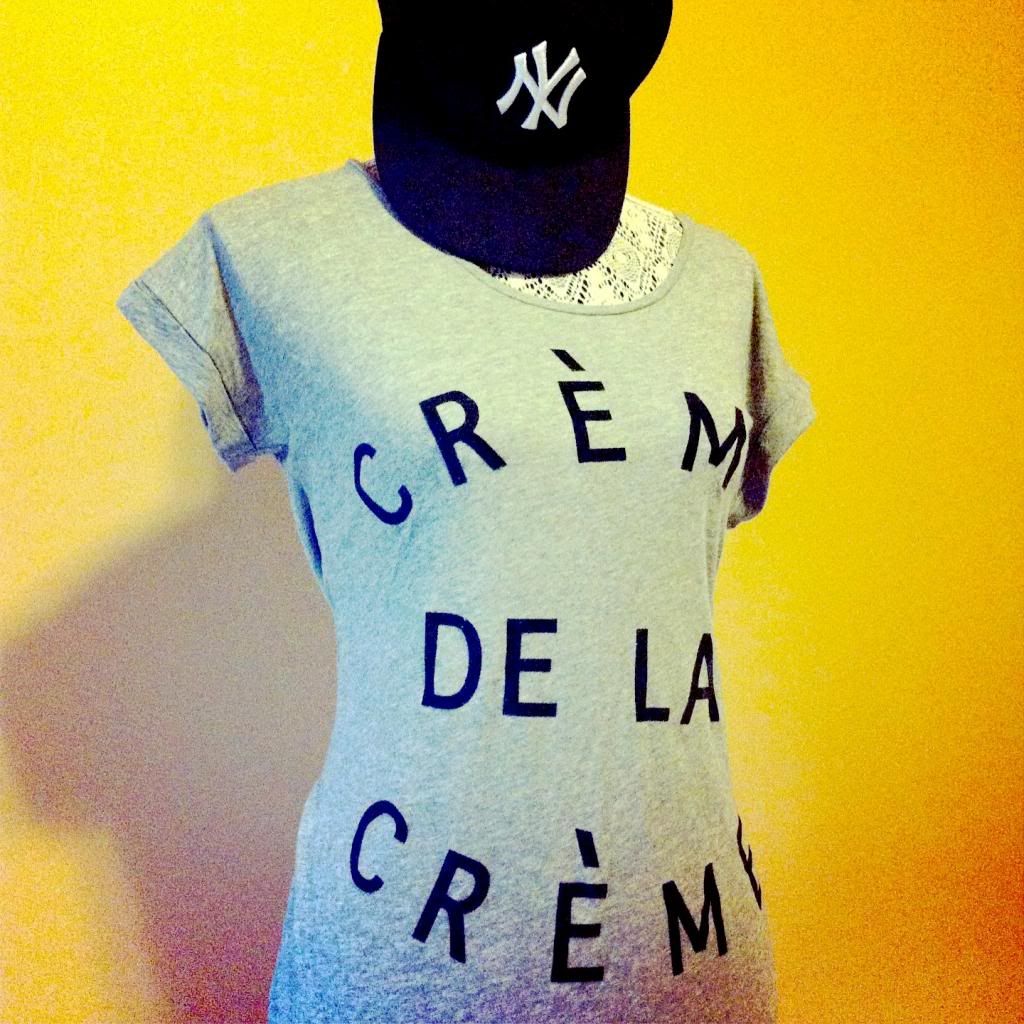
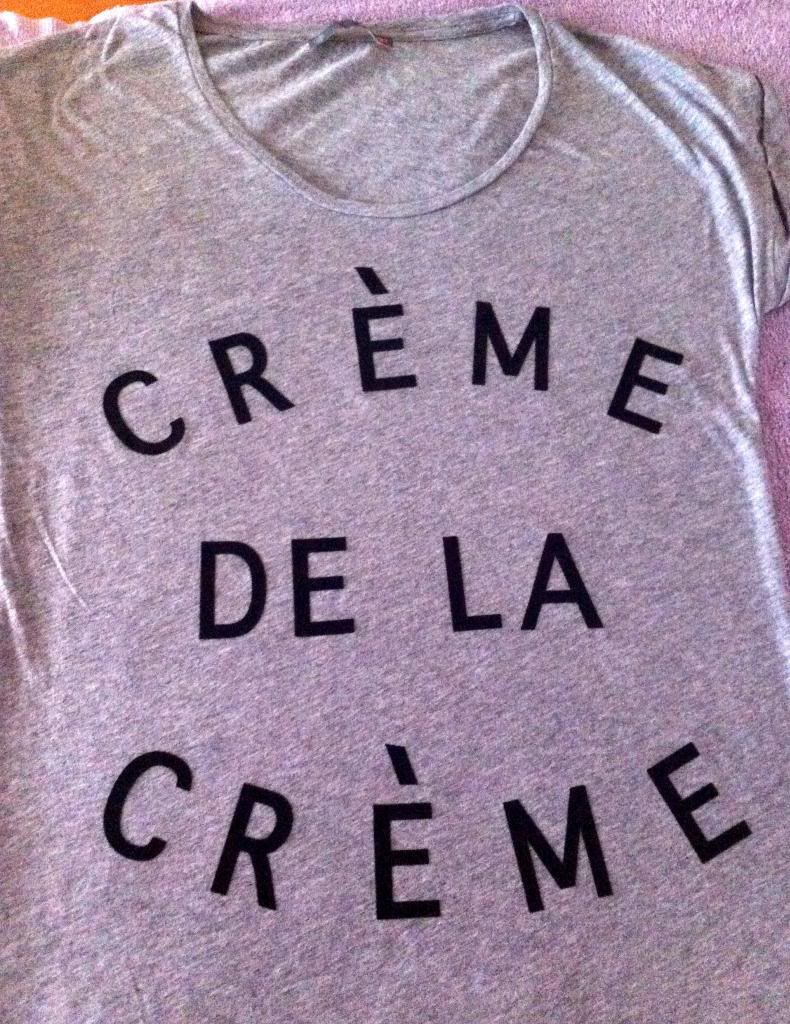
Today my lovely girl Lacey here (also known to others as a dress form) is sporting my latest creation inspired by Atlantic-Pacific's very popular Creme De La Creme sweater (seen here). Since the original shirt is a teensy bit out of my price range I decided to create a similar look for a lot less by using some Letter Transfermations from Micheals, and a T-Shirt from Smart Set.
The whole operation cost me under $25 (which is much more agreeable with my wallet). I used coupons from the Micheal's app from my phone, and I ended up saving 40% on one set of stickers and 50% on another, and then I used my teacher's license discount to save the tax on another set. I picked up the t-shirt from Smart Set last weekend that was on sale for 9.99 and then an additional 40% off. It's super soft, and perfect for summer.
Supplies:
One t-shirt or sweater (washed and dryed without fabric softener)
3 packages of Letter Transfermations (you need 3 because of the "E's")
Iron
One tea towel or cloth
Scissors
Measuring tape (optional)
Instructions:
There are instructions on the back of the Transfermations package, but there were some gray areas for us (no pun intended), so I thought I would put together instructions for what I did to help minimize error for you dearest blog reader.
Find a flat surface, and lay down a towel. Iron your shirt on top of the towel, so it is as flat as possible and evenly spread out as possible.
Cut out and arrange letters. Make sure to leave enough of the plastic backing on the letters, so you can actually peel off the excess borders later. I found cutting the letters in squares really helped in peeling them off because you could secure the shirt while you pulled up on the plastic backing by grabbing the corners. Place letters how you want them to appear on your shirt (plastic side up).
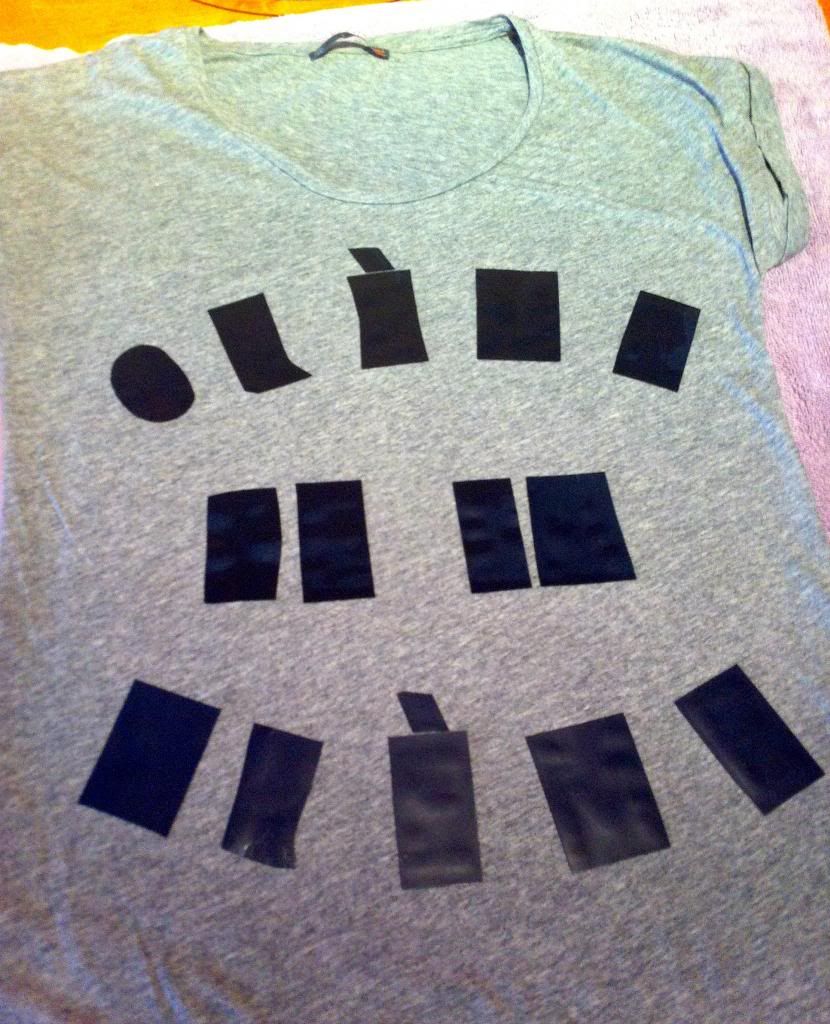
While arranging the letters try your best to line up the "E" in the middle of "Creme" for both the top and bottom to help make sure your t-shirt is symetrical. We measured the width of the shirt and found the centre point and placed the "E" there and build out the other letters around them.
For the accents on the middle E's I simply cut an "I" into two pieces and cut both edges on a diaganol. They didn't end up as close to "E" as I would have liked, but they fell off the first time I ironed the letters on, and so I had to start all over again, I didn't get them as close the second time. Oh well - you win some you lose some.
Once your letters are where you want them to be, carefully cover the shirt with a tea towel and apply heat with the iron over all the letters for about one minute making sure to get all the letters equally with heat. We found that the "wool" setting wasn't hot enough, and so when we tried to flip the shirt over we lost some letters and had to start all over again. So once we repostioned all the letters again we turned up the heat, and then double the time, and they stuck the second time. Phewf!
Once you think you've aheared all the letters to the shirt, carefully turn it inside out, and iron the letters again through the inside of the shirt.
Turn shirt right side in, and allow to cool.
Once the letters have cooled about 1-3 minutes, carefully peel the plastic backing off the letters. If your letters are sticking to the plastic, simply iron them again. I found pulling the letters from the bottom corners first worked really well, as I could gently hold the shirt down and pull off the plastic backing therefore preventing any unnecessary tugging and/or pulling.
Leave shirt set for 24 hours before wearing. This will be tricky because you will strongly need to resist the urge to wear your favorite new shirt! As exciting as it is to create something yourself you will need to wait 24 hours before you can wear this bad boy.
Care Instructions: DO NOT under any circumstances iron directly on the letters.
Hand wash, and lay flat to dry, and iron shirt inside out.
If you attempt this (and you should) good luck and may the odds be ever in your favor! Let me know how it goes by commenting below or tweeting me @shortpresents
Happy Thursday Blog Reader,
Sincerely,
Short Presents
No comments:
Post a Comment